Thursday, July 13, 2023

Texas Tornado Cake


Texas Tornado Cake 

 Irresistible Delight: Exploring the Deliciousness of Texas Tornado Cake

Introduction:

If you're a fan of rich, moist, and delectable cakes, then Texas Tornado Cake is sure to capture your taste buds with its irresistible combination of flavors. This classic dessert hails from the Lone Star State, where it has been loved and enjoyed for generations. Filled with a whirlwind of ingredients such as pecans, coconut, and pineapple, this cake will sweep you off your feet with its delightful taste and captivating texture. Join us as we dive into the world of Texas Tornado Cake and discover what makes it a beloved treat for all.

A Whirlwind of Flavors and Texture:

Texas Tornado Cake is renowned for its unique combination of ingredients that blend harmoniously to create a symphony of flavors. Here's what makes this cake so exceptional:

Moist and Tender Cake Base:

At the heart of the Texas Tornado Cake lies a moist and tender cake base. Traditionally, this cake is made using a simple buttermilk batter that guarantees a soft and light texture.

Pineapple and Coconut Infusion:

Adding a tropical twist, crushed pineapple, and sweetened shredded coconut are folded into the cake batter. These ingredients not only contribute to the cake's moistness but also infuse it with bursts of flavor.

Pecan Streusel Topping:

The crowning glory of the Texas Tornado Cake is its pecan streusel topping. A mixture of chopped pecans, butter, brown sugar, and cinnamon is generously sprinkled on top of the cake, creating a delightful caramelized crunch.

Sweetened Butter Sauce:

To take the cake to another level of decadence, a luscious sweetened butter sauce is poured over the warm cake fresh from the oven. The sauce seeps into the cake, adding moisture and a rich, buttery sweetness.

Baking the Texas Tornado Cake:

Here's a simplified version of the Texas Tornado Cake recipe to help you create this irresistible dessert at home:

Ingredients:

For the Cake:

2 cups all-purpose flour

2 cups granulated sugar

2 large eggs

1 teaspoon baking soda

1 teaspoon vanilla extract

1/2 cup buttermilk

1 can (8 ounces) of crushed pineapple, drained

1/2 cup sweetened shredded coconut

For the Pecan Streusel Topping:

1/2 cup chopped pecans

1/2 cup packed brown sugar

1/4 cup unsalted butter, melted

1/2 teaspoon ground cinnamon

For the Sweetened Butter Sauce:

1/2 cup unsalted butter

1 cup granulated sugar

1/2 cup evaporated milk

1 teaspoon vanilla extract

Instructions:

Preheat your oven to 350°F (175°C) and grease a 9x13-inch baking dish.

In a large mixing bowl, combine the flour, sugar, eggs, baking soda, vanilla extract, buttermilk, crushed pineapple, and shredded coconut. Stir until well combined.

Pour the cake batter into the prepared baking dish, spreading it evenly.

In a separate bowl, mix together the chopped pecans, brown sugar, melted butter, and ground cinnamon to create the streusel topping. Sprinkle the mixture over the cake batter.

Place the cake in the preheated oven and bake for approximately 35-40 minutes or until a toothpick inserted into the center comes out clean.

While the cake is baking, prepare the sweetened butter sauce. In a saucepan, melt the butter over medium heat. Stir in the granulated sugar, evaporated milk, and vanilla extract. Cook the sauce for a few minutes until the sugar is dissolved and the sauce is heated through.

When the cake is done baking, remove it from the oven and immediately pour the sweetened butter sauce evenly over the hot cake.

Allow the cake to cool slightly before serving. The flavors will meld together as the cake cools, making it even more delicious.

Enjoying the Texas Tornado Cake:

Texas Tornado Cake is best enjoyed when it's still warm or at room temperature. Serve generous slices of this moist and flavorful cake on its own or pair it with a scoop of vanilla ice cream for an indulgent treat. With every bite, you'll experience the perfect balance of tropical flavors, buttery richness, and delightful textures.

Tornado Cake | Fast and Easy Recipe | Do Nothing Tornado Cake

Conclusion:

Texas Tornado Cake is a true gem in the world of desserts, captivating taste buds with its rich flavors and delightful textures. This classic Texas treat showcases the irresistible combination of pineapple, coconut, and pecans, all brought together with a sweetened butter sauce. Baking this cake at home will fill your kitchen with the heavenly aroma of warm, freshly baked goodness. So, gather your ingredients, embrace the whirlwind of flavors, and indulge in the joy that Texas Tornado Cake brings.

Freezer Friendly Breakfast Burritos


Freezer Friendly Breakfast Burritos 

Convenient and Delicious: Freezer-Friendly Breakfast Burritos for Busy Mornings

Introduction:

Mornings can be hectic, leaving little time to prepare a nutritious breakfast. But fear not! Freezer-friendly breakfast burritos are here to save the day. These convenient and delicious handheld delights can be prepared ahead of time, frozen, and enjoyed whenever you need a quick and satisfying morning meal. Packed with protein, veggies, and flavor, freezer-friendly breakfast burritos are a game-changer for busy individuals and families on the go.

Why Choose Freezer-Friendly Breakfast Burritos?

Time-Saving Solution: By preparing breakfast burritos in advance, you eliminate the need for morning prep work. Simply grab one from the freezer, heat it up, and you're good to go.

Customizable and Nutritious: You have the freedom to tailor the ingredients to suit your taste and dietary preferences. Load them up with scrambled eggs, lean meats, cheese, and a variety of veggies for a balanced and wholesome start to your day.

Portability: Breakfast burritos are the ultimate grab-and-go breakfast option. Whether you're rushing out the door, commuting to work, or need a quick bite on a road trip, these portable packages have got you covered.

Budget-Friendly: Making your own freezer-friendly breakfast burritos is not only convenient but also economical. You can buy ingredients in bulk, utilize leftovers, and save money on expensive breakfast options outside.

Ingredients:

Large tortilla wraps (whole wheat, flour, or gluten-free)

Eggs (or egg substitute)

Cooked protein (e.g., bacon, sausage, ham, or tofu)

Grated cheese (cheddar, Monterey Jack, or your favorite cheese)

Chopped vegetables (bell peppers, onions, spinach, mushrooms, etc.)

Salt, pepper, and any desired spices or herbs (e.g., paprika, chili powder, or parsley)

Instructions:

Scramble the eggs in a skillet over medium heat until cooked through. Season with salt, pepper, and any desired spices or herbs.

In a separate pan, cook your choice of protein (bacon, sausage, ham, or tofu) until fully cooked and slightly crispy. Set aside.

Sauté the chopped vegetables in a little oil until tender. Season with salt and pepper.

Lay out the tortilla wraps and assemble the burritos. Start by adding a layer of scrambled eggs, followed by the cooked protein, sautéed vegetables, and a sprinkle of grated cheese.

Fold the sides of the tortilla inward, then roll it up tightly, making sure all the fillings are secured inside.

Wrap each burrito individually in foil or plastic wrap and place them in a freezer-safe bag or container.

Label and date the bag/container and store it in the freezer for up to 3 months.

Reheating and Serving:

To reheat a frozen breakfast burrito, unwrap it partially and place it on a microwave-safe plate.

Microwave on high for 1-2 minutes, then flip the burrito over and microwave for another 1-2 minutes until heated through.

Allow the burrito to cool for a minute or two before enjoying it.

Optional Additions and Tips:

You can add additional toppings or condiments such as salsa, sour cream, avocado, or hot sauce after reheating.

For a crispy exterior, you can toast the reheated burrito in a skillet or toaster oven for a few minutes.

Consider making a variety of burrito fillings to suit different tastes. Vegetarian options with beans or roasted vegetables are also excellent choices.

How To Make Breakfast Burritos | Freezer Friendly Meal Prep

Conclusion:

Freezer-friendly breakfast burritos are a lifesaver for those busy mornings when time is limited. With a little preparation, you can enjoy a delicious, homemade breakfast that's both satisfying and nutritious. These portable bundles of goodness allow you to start your day on the right foot, providing the energy and fuel needed to tackle whatever lies ahead. So, say goodbye to breakfast stress and hello to the convenience and deliciousness of freezer-friendly breakfast burritos!

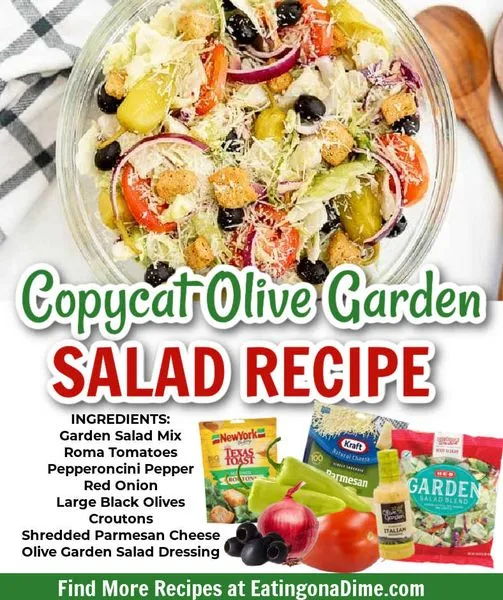
Copycat Olive Garden Salad Recipe


Copycat Olive Garden Salad Recipe 

Recreate the Irresistible Olive Garden Salad at Home with This Copycat Recipe

Introduction:

Olive Garden, the popular Italian-American restaurant chain, is known for its delicious and refreshing salad. With its crisp lettuce, tangy dressing, and flavorful mix-ins, it's no wonder that Olive Garden's salad is a crowd favorite. If you've ever wished to enjoy this delectable salad in the comfort of your own home, you're in luck! We have a fantastic copycat recipe that will allow you to recreate Olive Garden's salad and dressing right in your own kitchen.

Ingredients for the Salad:

6 cups romaine lettuce, washed and chopped

1 cup iceberg lettuce, washed and chopped

1/2 cup sliced red onions

1/2 cup sliced black olives

1/2 cup sliced banana peppers

1/2 cup cherry tomatoes, halved

1/4 cup grated Parmesan cheese

Ingredients for the Dressing:

1/2 cup mayonnaise

1/4 cup white vinegar

2 tablespoons corn syrup

2 tablespoons grated Parmesan cheese

2 tablespoons lemon juice

1 teaspoon dried Italian seasoning

1/2 teaspoon garlic powder

1/2 teaspoon onion powder

Salt and pepper to taste

Instructions:

In a large salad bowl, combine the romaine lettuce and iceberg lettuce.

Add the sliced red onions, black olives, banana peppers, and cherry tomatoes to the bowl.

Sprinkle the grated Parmesan cheese over the top.

Toss the salad ingredients gently to combine them.

In a separate bowl, whisk together the mayonnaise, white vinegar, corn syrup, grated Parmesan cheese, lemon juice, dried Italian seasoning, garlic powder, onion powder, salt, and pepper. Mix until well combined.

Pour the dressing over the salad and toss until all the ingredients are evenly coated.

Serve the salad immediately as a refreshing appetizer or side dish to your favorite Italian meal.

Tips for an Authentic Olive Garden Salad Experience:

For an extra crunch, you can add croutons to the salad.

Feel free to customize the salad by adding or substituting ingredients based on your preferences. Some popular additions include sliced cucumbers, pepperoncini, or roasted red peppers.

To make the dressing ahead of time, simply store it in an airtight container in the refrigerator. It will keep well for up to a week.

How to make THE OLIVE GARDEN'S | House Salad with House Dressing

Enjoying the Olive Garden Salad at Home:

Now that you have the copycat recipe for Olive Garden's famous salad and dressing, you can savor its flavors anytime you like. This recipe allows you to recreate the crisp, fresh, and tangy goodness of Olive Garden's salad in the comfort of your own kitchen. Whether you're hosting a dinner party, enjoying a family meal, or simply craving a taste of Italy, this salad recipe is sure to impress and satisfy your taste buds. So, gather your ingredients and get ready to experience the authentic Olive Garden salad experience right at home. Buon appetito!

Cotton Candy Fudge


Cotton Candy Fudge 

Cotton Candy Fudge: A Delightful Twist on a Classic Treat

Introduction:

Indulging in a sweet treat can be a delightful experience, especially when it combines the nostalgic flavors of childhood with a modern twist. Cotton Candy Fudge is a confectionery creation that captures the essence of carnival delights and merges it with traditional fudge's smooth, creamy texture. This delectable dessert is a perfect combination of whimsy and decadence, offering a unique experience that will leave your taste buds wanting more. Join us as we dive into the world of Cotton Candy Fudge and discover why it has become a beloved treat for all ages.

The Fusion of Carnival Magic and Fudge Excellence:

Cotton Candy Fudge beautifully marries the fluffy, sugary goodness of cotton candy with the rich, velvety texture of fudge. This delightful fusion creates a sensory experience that is truly one-of-a-kind. By incorporating the essence of cotton candy into fudge, confectioners have managed to capture the fun and joy of the carnival atmosphere in a bite-sized treat.

Flavors That Take You Back:

One of the most enchanting aspects of Cotton Candy Fudge is the way it evokes a sense of nostalgia. Just like the colorful cotton candy clouds at the fair, this fudge comes in vibrant hues that transport you back to carefree childhood days. The flavors are reminiscent of the classic cotton candy you would find at a carnival, instantly igniting a wave of happy memories. With each bite, you'll be taken on a journey back to merry-go-rounds, Ferris wheels, and the sweet scent of spun sugar in the air.

The Art of Crafting Cotton Candy Fudge:

Creating Cotton Candy Fudge is a delicate art form that requires precision and expertise. Skilled confectioners start with a base of traditional fudge, made by combining sugar, butter, and condensed milk. Then, they infuse the mixture with cotton candy flavoring and tint it with pastel colors to achieve the signature look. The fudge is carefully poured into molds or cut into squares, resulting in bite-sized pieces of pure delight.

Irresistible Texture and Taste:

One bite of Cotton Candy Fudge reveals its irresistible texture. The fudge base lends a smooth and creamy mouthfeel, while the cotton candy flavoring adds a delicate sweetness that is not overpowering. The harmonious combination of flavors and textures makes each piece a delightfully indulgent experience. The fudge melts in your mouth, leaving a lingering, sugary aftertaste that is heavenly.

A Crowd-Pleasing Treat:

Cotton Candy Fudge has quickly gained popularity due to its appeal to all ages. Children are captivated by the whimsical appearance and vibrant colors, while adults appreciate the nostalgic charm and exquisite taste. Its versatility also makes it a perfect treat for various occasions, such as birthday parties, weddings, or simply as a delightful indulgence to brighten up any day.

Homemade Cotton Candy Fudge | FunFoods

Conclusion:

Cotton Candy Fudge is a delightful twist on a classic treat, bringing together the enchantment of carnival memories with the indulgence of smooth, creamy fudge. It's vibrant colors and sweet flavors make it a true crowd-pleaser that transports you back to the carefree days of childhood. Whether you enjoy it as a personal indulgence or share it with loved ones, Cotton Candy Fudge is a confectionery masterpiece that will leave a lasting impression. So go ahead, treat yourself to a little taste of whimsy, and enjoy the magic of Cotton Candy Fudge!

Easy Air Fryer Cheese Cake


Easy Air Fryer Cheese Cake 

Easy Air Fryer Cheesecake: A Quick and Decadent Dessert

Introduction:

Air fryers have revolutionized cooking by providing a healthier and more efficient way to enjoy fried foods. But did you know that they can also be used to create mouthwatering desserts? Enter Easy Air Fryer Cheesecake—a delicious and hassle-free treat that will satisfy your sweet tooth. With its creamy and velvety texture, combined with a golden crust, this cheesecake recipe is a game-changer for dessert lovers. So, fire up your air fryer and get ready to indulge in a quick and decadent dessert experience.

The Benefits of Air Fryer Cheesecake:

Air fryers offer a convenient and time-saving alternative to traditional baking methods. They circulate hot air around the food, creating a crispy exterior while retaining moisture inside. This technique translates perfectly to cheesecake, resulting in a light and fluffy texture with a perfectly golden crust. The air fryer's quick cooking time means you can enjoy homemade cheesecake without the need for a lengthy oven bake.

Ingredients for Easy Air Fryer Cheesecake:

To create this delectable dessert, gather the following ingredients:

For the Crust:

1 1/2 cups graham cracker crumbs

1/4 cup melted unsalted butter

2 tablespoons granulated sugar

For the Cheesecake Filling:

16 ounces cream cheese, softened

1/2 cup granulated sugar

2 large eggs

1/4 cup sour cream

1 teaspoon vanilla extract

Zest of 1 lemon (optional)

Instructions:

In a mixing bowl, combine the graham cracker crumbs, melted butter, and granulated sugar for the crust. Mix until the crumbs are evenly coated with the butter and sugar.

Press the mixture firmly into the bottom of a greased 7-inch springform pan, ensuring an even and compact layer. Place the crust in the refrigerator while you prepare the cheesecake filling.

In a separate mixing bowl, beat the softened cream cheese and granulated sugar until smooth and creamy.

Add the eggs one at a time, beating well after each addition. Then, add the sour cream, vanilla extract, and lemon zest (if desired). Continue to beat until all the ingredients are fully combined and the mixture is smooth.

Remove the crust from the refrigerator and pour the cheesecake filling over the crust, spreading it evenly.

Preheat your air fryer to 320°F (160°C).

Place the filled springform pan into the air fryer basket and set the timer for 30 minutes.

Once the time is up, check the cheesecake's doneness by gently shaking the pan. The center should still jiggle slightly. If necessary, continue cooking in 5-minute increments until the desired consistency is reached.

Carefully remove the cheesecake from the air fryer and let it cool at room temperature for about 30 minutes.

Transfer the cheesecake to the refrigerator and let it chill for at least 4 hours or overnight to set.

When ready to serve, remove the cheesecake from the springform pan and slice it into desired portions.

Optional: Garnish with fresh fruits, whipped cream, or a dusting of powdered sugar for added visual appeal.

How to Make Cheesecake in an Air Fryer

Conclusion:

Easy Air Fryer Cheesecake provides a convenient and delicious way to enjoy a homemade dessert without the need for lengthy oven baking. The air fryer's quick cooking time and even heat distribution result in a perfectly golden crust and a creamy, velvety cheesecake filling. With its simplicity and decadent flavors, this dessert is a crowd-pleaser that will have everyone asking for seconds. So, take advantage of your air fryer's versatility and treat yourself to a quick and delightful dessert experience.

German Potato Salad


German Potato Salad 

German Potato Salad: A Hearty and Flavorful Side Dish

Introduction:

German Potato Salad, or Kartoffelsalat, is a classic and beloved dish that showcases the heartiness and simplicity of German cuisine. Unlike its mayonnaise-based American counterpart, German Potato Salad is dressed in a warm, tangy, and slightly sweet vinaigrette. With its tender potatoes, crispy bacon, and aromatic flavors, this side dish offers a delightful combination of textures and tastes that will complement a variety of meals. Whether you're hosting a barbecue or picnic, or simply want to elevate your dinner menu, German Potato Salad is a flavorful addition that will please both your family and guests.

The Essence of German Cuisine:

German cuisine is known for its focus on hearty and comforting dishes that reflect the country's agricultural heritage. German Potato Salad is a prime example of this cuisine, featuring the humble potato as the star ingredient. The flavors are derived from a combination of vinegar, mustard, and bacon, which adds a savory and smoky touch to the dish. The result is a satisfying and flavorful salad that is both versatile and delicious.

Ingredients for German Potato Salad:

To make a traditional German Potato Salad, gather the following ingredients:

2 pounds Yukon Gold potatoes, peeled and diced

6 slices bacon, diced

1 small onion, finely chopped

2 tablespoons apple cider vinegar

1 tablespoon Dijon mustard

1 tablespoon granulated sugar

Salt and pepper, to taste

2 tablespoons chopped fresh parsley (optional, for garnish)

Instructions:

In a large pot, bring salted water to a boil. Add the diced potatoes and cook until tender but still firm, about 10-12 minutes. Drain the potatoes and set them aside.

In a skillet, cook the diced bacon over medium heat until crispy. Use a slotted spoon to transfer the cooked bacon to a paper towel-lined plate, leaving the bacon drippings in the skillet.

In the same skillet with the bacon drippings, sauté the chopped onion over medium heat until it becomes translucent and slightly caramelized. This should take about 5 minutes. Remove the skillet from heat.

In a small bowl, whisk together the apple cider vinegar, Dijon mustard, granulated sugar, salt, and pepper until well combined.

In a large mixing bowl, combine the cooked potatoes, sautéed onions, and crispy bacon. Pour the vinegar-mustard dressing over the mixture and gently toss until the potatoes are well coated.

Allow the German Potato Salad to sit at room temperature for at least 30 minutes, allowing the flavors to meld together.

Just before serving, taste the salad and adjust the seasoning if needed. Garnish with chopped fresh parsley for added freshness and presentation.

Serve the German Potato Salad warm or at room temperature as a side dish alongside grilled meats, and sausages, or as part of a buffet-style spread.

GERMAN POTATO SALAD with a warm bacon vinegar Dijon dressing!

Conclusion:

German Potato Salad is a delightful and flavorful side dish that brings a touch of German culinary tradition to your table. With its warm vinaigrette dressing, tender potatoes, and crispy bacon, this salad offers a unique and satisfying taste experience. Whether you're hosting a gathering, attending a potluck, or simply want to enjoy a taste of Germany, German Potato Salad is a versatile and delicious choice. So, embrace the flavors of this traditional dish and savor the heartiness and simplicity it brings to your mealtime.